
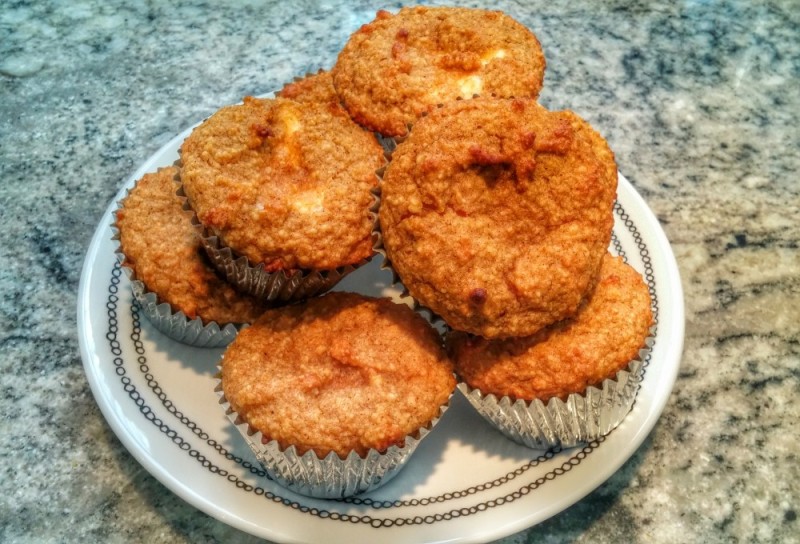
Pumpkin Cream Cheese Muffins
Bedazzled Pumpkins
This time of year I think about how I am going to decorate my porch for Halloween. Halloween is my favorite holiday, but lately I have been taking it easy compared to the massive parties I used to have. I'm chilling this Halloween, too.
My porch, for the trick-or-treaters, is still a priority. I have done the elaborate pumpkin carving in the past. I am over that. The last few years I went back to basic jack-o-lanterns (carved out fresh pumpkins) but I am now looking forward to alternatives. In the Midwest (and in the big city of Chicago) it is hard to keep a carved pumpkin lit. I wanted alternatives.
I'm here to declare I have one. I totally stole this original idea from Good Housekeeping magazine. I love their cover with the studded pumpkins turned into flower vases. I just took it a step further.
My idea isn't less expensive and it's not less time consuming but it sure is fun. I'm not as crafty as I used to be but this is worth the time. It's almost Zen in the approach. I took three pumpkins and decorated them three different ways to inspire you. I also have some technique elements to give you ideas for your own creations.
It's amazing what you can do with tacks. They give your pumpkins bling! There are all kinds of tacks and push pins available but the cheapest and easiest are the regular old-fashioned ones. There are designer tacks now too. Take a look at these by Nate Berkus. Using a lot of these would make one expensive pumpkin but it would be really jazzy. You could even just run a ring of these tacks around the top of a small pumpkin and call it a project.
The easiest design option is to do vertical lines. If you are into easy, do that. I actually love it. That is also the cheapest option depending on how far you keep the lines of tacks apart. Eight vertical lines will look great on any pumpkin. Do four quarters and then divide those in half.
The older or bigger the pumpkin the easier to press in the tacks. The small pie pumpkins have pretty hard flesh. You really have to work to get the tacks into that kind. In this case I used push pins to go with a black and white theme.
In the first version I took an antique broach and stuck that in to give it sort of a finial look. I also took regular wrapping paper ribbon ideas to give the top a gift flair. That was a favorite.
I tried to find the bumpy tacks. Those would look really cool but I am sure they come at a higher price too. Whatever you decide to use I'm sure will look great. The little packs of 100 regular tacks are about $2 each. The big pumpkin took 3 boxes of tacks. One option to keep it less expensive would be to decorate just one side.
On my taller pumpkin I did two designs. One for each side. The back is just vertical lines and the front it a spider web. I even thought about getting a little plastic spider and tacking that on the pumpkin. Just an extra touch.
One of the things I found is it's easiest to work in the direction of your writing hand. So if you are right handed you'll likely move faster and more efficiently if you put in the tacks from left to right.
You can draw your design on the pumpkin or go free hand. I did a light design with a water-based thin marker. That way I could work a little faster too. All three pumpkins didn't take me two hours though. And I could watch TV (sort of) at the same time. If your kids or grand kids are old enough to handle tacks they will love to get in on the action.
Don't stress about trying to get your lines perfectly straight. None of these are. For thing like the cross pattern or the spider I started in the middle and worked my way out. That made it easier.
I can't tell you how long these pumpkins will last. I am confident they will last longer than a carved pumpkin but they do have lots of holes poked in them so they are going to spoil eventually. I got mine done now so I could pass the idea on to you but otherwise I'd probably just do them a few days ahead of Halloween.
Enjoy your holiday.
If you're like me you'll have fun passing out little toys to the trick-er-treaters instead of candy. The kids love to get a toy.
Pumpkin Cream Cheese Muffins
This perfect pumpkin treat invites all the spice and warmth of autumn into your mouth without the additional unwanted carbs.
Servings: Serves 15
Ingredients:
Pumpkin Muffins
3/4 cup pumpkin puree
3 cups almond flour (Honeyville)
1/3 cup unflavored whey protein powder
2 tsp baking powder
1/2 tsp baking soda
1/2 tsp salt
1-1/2 tsp cinnamon
1/2 tsp ginger
1/4 tsp cloves
1/4 cup butter, softened
1/2 cup Swerve Sweetener
3 large eggs
1/2 tsp vanilla extract
1/4 cup cream
Cream Cheese Filling:
8oz cream cheese, softened
1/4 cup powdered Swerve Sweetener
2 tsp cream
1/2 tsp vanilla
Instructions:
On a plate lined with two layers of paper towel, spread out the pumpkin puree and blot with another layer or two of paper towels. Let sit while making the cream cheese filling. For the cream cheese filling, beat cream cheese with powdered sweetener, cream and vanilla extract until smooth. Set aside.
For the muffins, preheat over to 325 degrees and line 15 muffin tins with paper liners.
In a medium bowl, whisk together the almond flour, protein powder, baking powder, baking soda, salt and spices.
In a large bowl, beat butter with sweetener until well combined. Beat in pumpkin puree, eggs and vanilla extract.
Beat in almond flour mixture in two additions, alternating with cream.
Drop a spoonful of batter into the bottom of the prepared muffin tins and use a spoon to make a well in the center. Drop a tablespoon of cream cheese filling into the well, then top with more batter to fill muffin tins about 75 percent full.
Bake 23 to 25 minutes, or until the tops are set and edges are just browned. Let them cool in the pan for 15 minutes before transferring to a wire rack to cool completely.
Repeat with any remaining batter and filling.
Enjoy!
Cheers,
Zola