
Here's How: Proper Method To Install a Mailbox Post
Dear James: My mailbox and post are old, look bad and have been hit a couple of times with bats. Do you have any tips for selecting and installing a new, secure one? -- Chad R.
Dear Chad: It can be quite confusing when you see the extensive variety of designs and prices in the mailbox aisle at the home center store. Solid black, white or silver are the most common colors, but you will also find some unique styles and designs available. Local craft stores also sell more decorative styles of mailboxes.
High-density polyethylene plastic mailboxes are durable and resist dents, but during very cold weather, they become somewhat brittle and crack if hit hard. Steel mailboxes can be painted to match your house, or adding a copper or brass mailbox adds a lot of class. Maintenance-free fiberglass mailboxes are very durable.
Consider adding an all-steel mailbox guard, often referred to as a vandal guard, that protects your mailbox and puts an end to damage from baseball bats, rocks or beer bottles. Security lock mailboxes are also available, and they include two keys.
Woodendipity offers mailboxes that make a statement about your interest in pets, wildlife, sports, hobbies, etc. They are complete sculptures over a built-in steel mailbox. Fifteen designs are available; they're crafted in cedar and rugged pine, hand-painted, signed, dated and numbered.
There are many attractive and decorative magnetic mailbox covers that can be placed over your mailbox. Change them easily for your very own signature, holidays or special occasions.
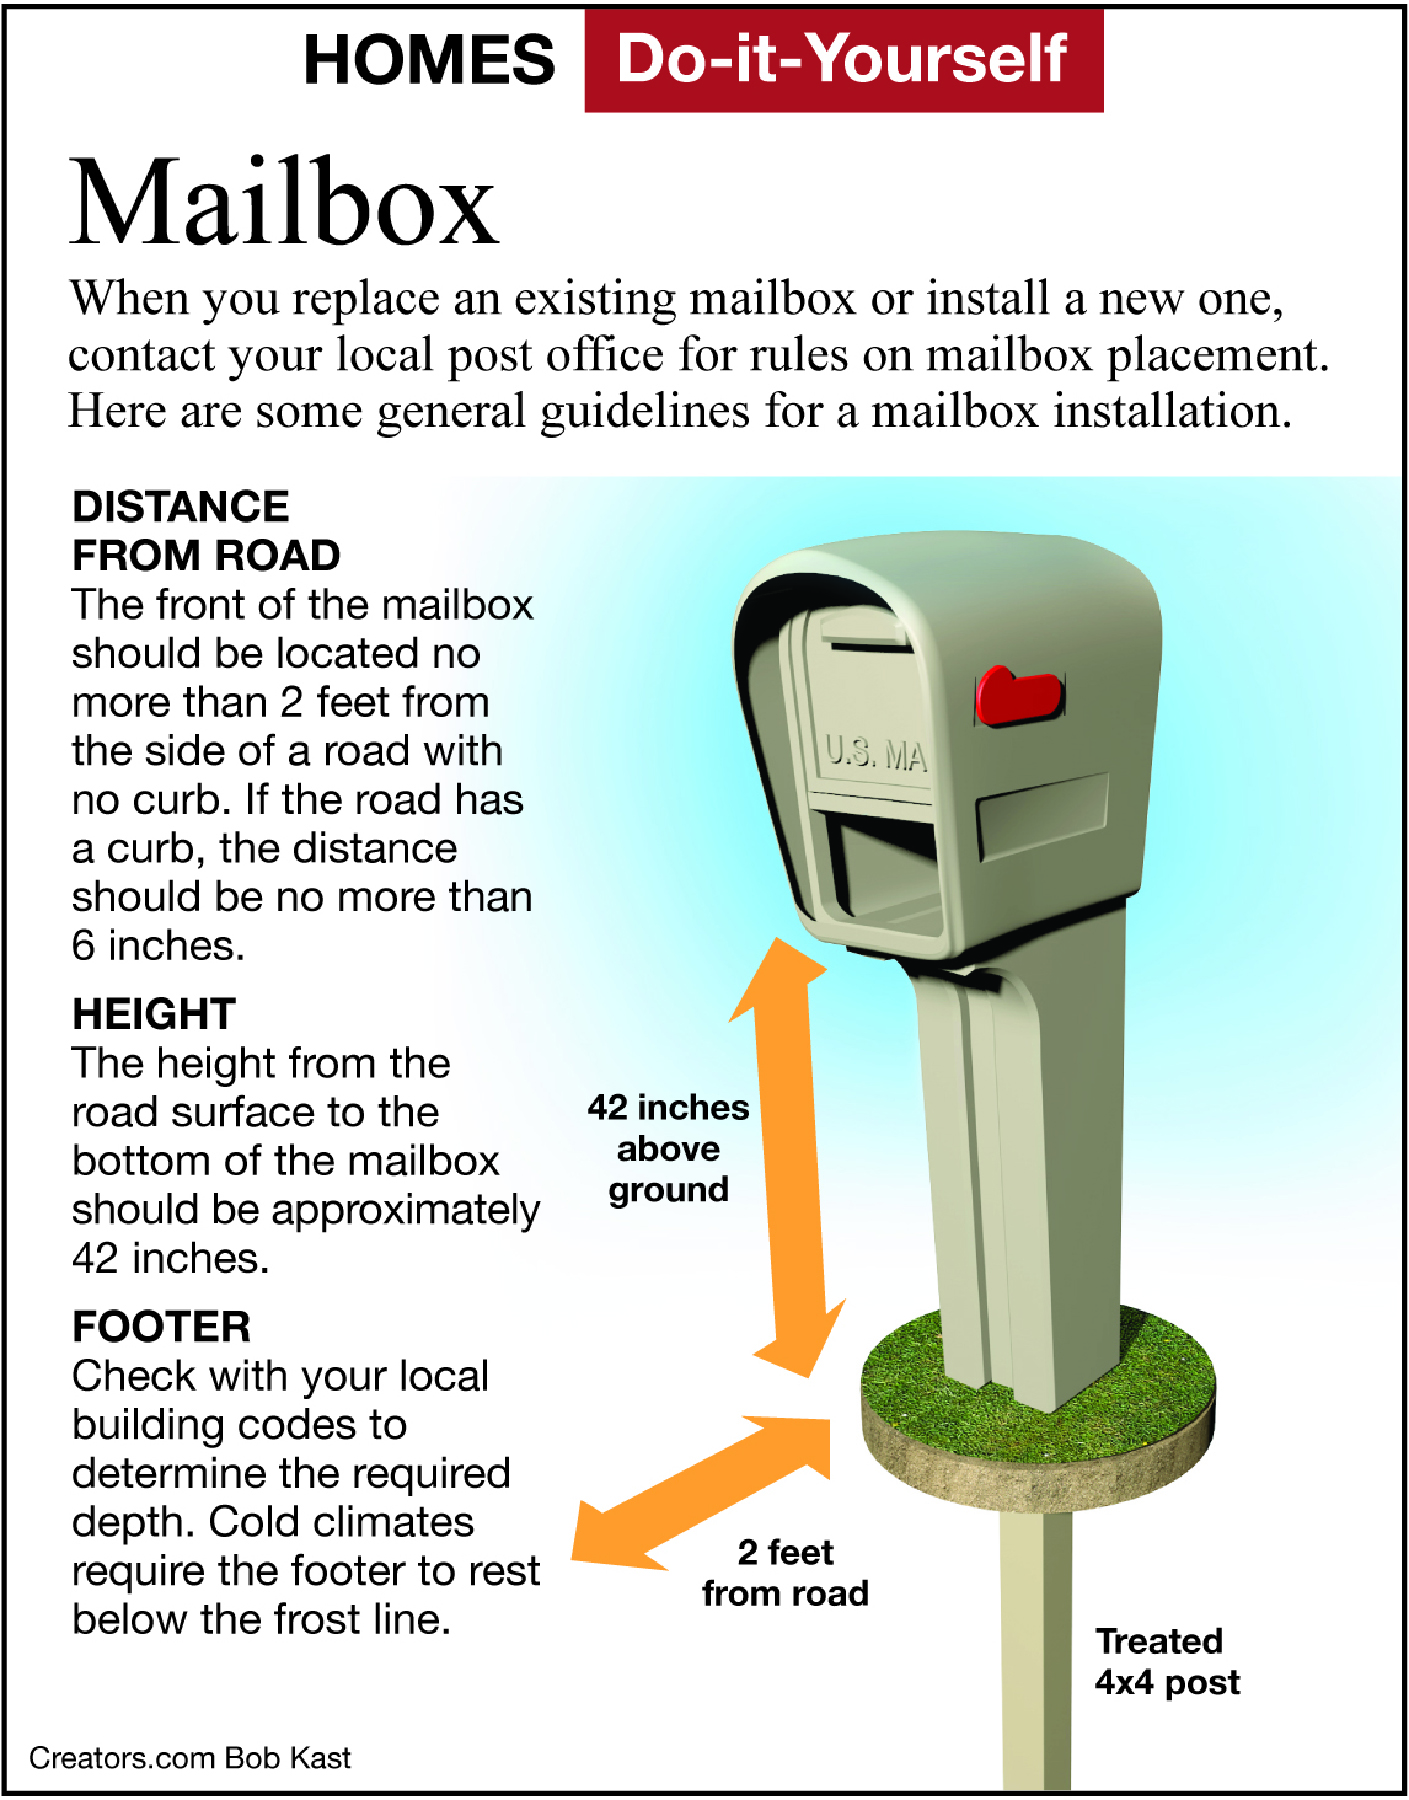
There are a few things that you will need to keep in mind when you replace an existing mailbox. There are federal regulations that you must adhere to. The regulation height is 42 inches from the bottom of the mailbox to the ground.
The mailbox needs to be accessible to the mail carrier. It needs to be on the right-hand side of the road. It should be located approximately 2 feet from the side of the road, and your house number should be clearly marked on the mailbox with numbers no less than 1 inch high.
The first step is locating the hole for the post so that the mailbox is the required 2 feet from the road. With the post hole digger, dig the hole deep enough for gravel to be added for drainage and so that the post surface to which the bottom of the mailbox will be attached is the required height.
Pour approximately 6 inches of gravel into the hole. Follow the manufacturer's instructions to prepare your concrete mix. Set the post in the hole and fill with the prepared concrete mix. To reduce any air pockets, you can occasionally jab a stick into the concrete.
Slope the concrete around the base of the post for water runoff. Pour it to within a few inches of the top of the hole. After the concrete has set, cover it with soil to conceal it.
The next step is to attach the mailbox to the post. Attachment brackets are available that are designed to fit a standard four-by-four-foot post. You can use your old brackets if your mailbox was installed that way. Also check to see if brackets came with your new mailbox.
Or if you prefer, you can cut a board to fit within the overhanging lips at the bottom of the mailbox. You will bolt the board to the post and then screw the mailbox to the board through the lips at the base of the mailbox.
Your final step will be to label the front and sides of the mailbox with your house numbers with paints, stick-on numbers or decorative letters to the post. The lettering should be at least 1 inch high.
========
Send your questions to Here's How, 6906 Royalgreen Dr., Cincinnati, Ohio, 45244 or visit www.dulley.com. To find out more about James Dulley and read features by other Creators Syndicate writers and cartoonists, visit the Creators Syndicate website at www.creators.com.
Copyright 2024 Creators Syndicate Inc.